Crave-Worthy Favorite Mini Pavlova Recipe
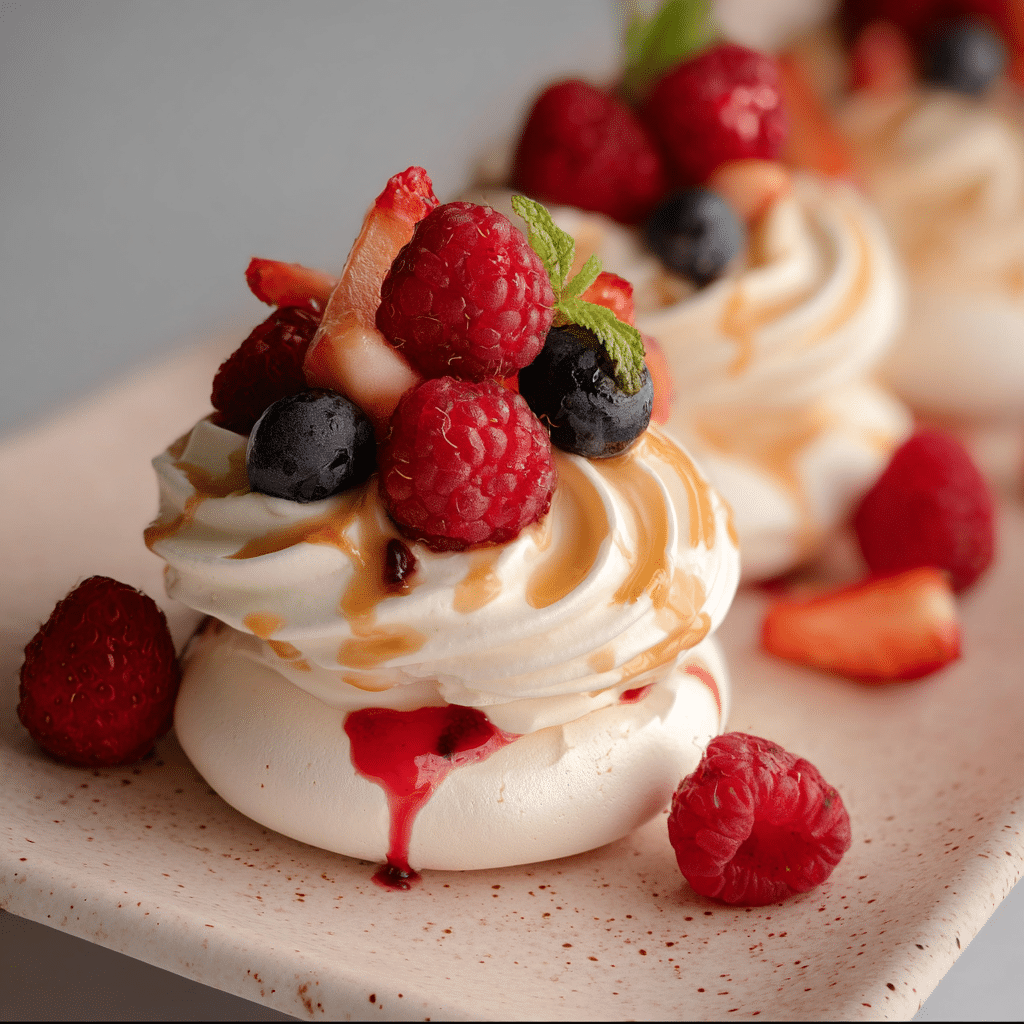
If you’re searching for a dessert that feels like a delicate cloud melting on your tongue, you must try this Favorite Mini Pavlova Recipe. This treat boasts a light and crispy meringue base topped with luscious whipped cream and vibrant fresh fruits that add bursts of natural sweetness and color. Whether you’re entertaining guests or just craving a simple sweet fix, these mini pavlovas deliver an irresistible combination of textures and flavors that make every bite memorable.
Why You’ll Love This Recipe
- Light and airy texture: The crisp outer shell and marshmallow-like center create a delightful contrast with every bite.
- Perfectly portioned: Mini pavlovas are ideal for individual servings, making them elegant and easy to enjoy.
- Fresh and vibrant: Topped with seasonal fruits, each pavlova bursts with color and natural sweetness.
- Simple ingredients: It’s made from basic pantry staples you probably already have, yet yields a show-stopping dessert.
- Versatile and customizable: The recipe adapts to your taste preferences or dietary needs with ease.
Ingredients You’ll Need
To make this Favorite Mini Pavlova Recipe, you only need a handful of key ingredients. Each one plays a crucial role in achieving that signature meringue crunch, creamy topping, and fresh fruity finish.
- Egg whites: The base of the meringue, whipped to stiff peaks for maximum volume and airy texture.
- Granulated sugar: Sweetens the meringue while stabilizing it to ensure a crisp crust.
- Cornstarch: Adds a light, marshmallowy interior and prevents cracking during baking.
- White vinegar: Enhances stability and tenderness of the meringue without an overpowering flavor.
- Heavy cream: Whipped to smooth, soft peaks to complement the crunchy shell.
- Fresh fruits: Strawberries, kiwi, blueberries, or passion fruit add a colorful, fresh finishing touch.
- Vanilla extract: Adds warmth and depth to the whipped cream topping.
Variations for Favorite Mini Pavlova Recipe
Feel free to make this Favorite Mini Pavlova Recipe your own. It’s incredibly flexible and can be tailored to match your palate or whatever you have on hand.
- Chocolate twist: Fold cocoa powder into the meringue for a mocha-flavored base that pairs beautifully with fresh raspberries.
- Vegan option: Use aquafaba (chickpea water) instead of egg whites to create a vegan-friendly meringue.
- Tropical flair: Top with mango, pineapple, and toasted coconut for an exotic taste adventure.
- Nutty crunch: Sprinkle chopped pistachios or toasted almonds over the whipped cream for added texture.
- Reduced sugar: Use powdered sugar alternatives or reduce sugar slightly without compromising texture.

How to Make Favorite Mini Pavlova Recipe
Step 1: Prep Your Oven and Baking Sheet
Begin by preheating your oven to 250°F (120°C). Line a baking sheet with parchment paper, then use a pencil and a round cookie cutter or small bowl to lightly trace circles — these will guide your mini pavlova sizes.
Step 2: Whip the Egg Whites
In a clean, dry bowl, beat egg whites on medium speed until soft peaks form. Gradually add granulated sugar one tablespoon at a time while continuing to beat until the mixture is glossy and stiff peaks form. This process ensures the meringue will hold its shape and become perfectly crisp when baked.
Step 3: Add Cornstarch and Vinegar
Gently fold cornstarch and white vinegar into the meringue, using a spatula to maintain the volume. These ingredients create the classic marshmallow center and stabilize the mixture for baking.
Step 4: Shape the Mini Pavlovas
Using a spoon or piping bag, form small nests on the parchment paper within the drawn circles. Create a slight well in the center of each to hold the whipped cream topping later.
Step 5: Bake and Cool
Bake at 250°F for 60 to 75 minutes until the outsides are dry and crisp but not browned. Once baked, turn off the oven, leaving the pavlovas inside to cool completely for about an hour. This slow cooling helps prevent cracks.
Step 6: Whip the Cream
While the pavlovas cool, whip heavy cream with vanilla extract until soft peaks form. The cream should be light and fluffy, ready to balance the crisp meringue base.
Step 7: Assemble and Garnish
Gently spoon or pipe whipped cream into the center of each mini pavlova. Top immediately with fresh fruit, arranging it prettily for that inviting look and refreshing flavor.
Pro Tips for Making Favorite Mini Pavlova Recipe
- Room temperature egg whites: They whip better and achieve more volume than cold ones straight from the fridge.
- Gradual sugar addition: Adding sugar slowly allows it to dissolve fully, creating a smooth, glossy meringue.
- Crisp but marshmallow center: Use cornstarch and vinegar to achieve the iconic pavlova texture.
- Low and slow baking: Keep the temperature low and bake long to avoid cracking and to dry out the meringue gently.
- Assemble just before serving: The whipped cream and fruit can make the pavlova soggy if left assembled too long.
How to Serve Favorite Mini Pavlova Recipe
Garnishes
Fresh fruit is the star garnish for this Favorite Mini Pavlova Recipe, offering vibrant color and light sweetness. Berries like strawberries and blueberries provide a classic pairing, while slices of kiwi or passion fruit add an exotic touch. A dusting of powdered sugar or a drizzle of passion fruit pulp can take presentation to the next level.
Side Dishes
Serve alongside a crisp glass of sparkling wine or a fruity dessert wine for celebrations. For a non-alcoholic option, a chilled herbal iced tea with lemon balances the sweetness beautifully. Simple biscotti or shortbread cookies also complement for extra crunch.
Creative Ways to Present
Present mini pavlovas on a tiered dessert platter for elegant gatherings or arrange them in individual clear cups layered with whipped cream and fruit for a modern parfait-style treat. You can also pipe decorative shapes or borders on top with leftover whipped cream for a fun touch.
Make Ahead and Storage
Storing Leftovers
Meringue shells can be stored in an airtight container at room temperature for up to three days. However, once topped with whipped cream and fruit, the mini pavlovas should be eaten within a few hours for best texture and freshness.
Freezing
You can freeze baked, cooled meringue shells for up to one month, wrapped tightly in plastic wrap and placed in a freezer-safe container. Thaw at room temperature when ready to assemble and serve.
Reheating
Reheating is not recommended, as pavlovas lose their crisp texture when warmed. Instead, enjoy them fresh or at room temperature to preserve their signature crunch and melt-in-mouth center.
FAQs
Can I make mini pavlovas without cornstarch?
While cornstarch helps create the signature marshmallow center, you can omit it, but expect a slightly less tender interior and a risk of more cracks.
What fruits work best on pavlova?
Any fresh fruit with a balance of sweetness and tartness works well, such as berries, kiwi, passion fruit, and stone fruits like peaches or nectarines.
How do I prevent cracks in pavlova?
Low oven temperature, slow cooling with the oven door ajar, and the addition of vinegar and cornstarch greatly reduce cracking risks.
Is it okay to use powdered sugar instead of granulated sugar?
Granulated sugar is preferred because it dissolves better during whipping, but superfine or caster sugar is a good alternative if available.
Can I prepare the pavlova shells ahead of time?
Yes! You can bake them ahead and store the shells at room temperature in an airtight container until ready to top and serve.
Final Thoughts
This Favorite Mini Pavlova Recipe is such a crowd-pleaser, combining simple ingredients into an unforgettable dessert that feels both special and effortless. The blend of crispy meringue, silky cream, and fresh fruit is sure to become a cherished go-to whenever you want to impress or simply indulge your sweet tooth. Give it a try, and enjoy the sweet delight of pavlova perfection in every bite!