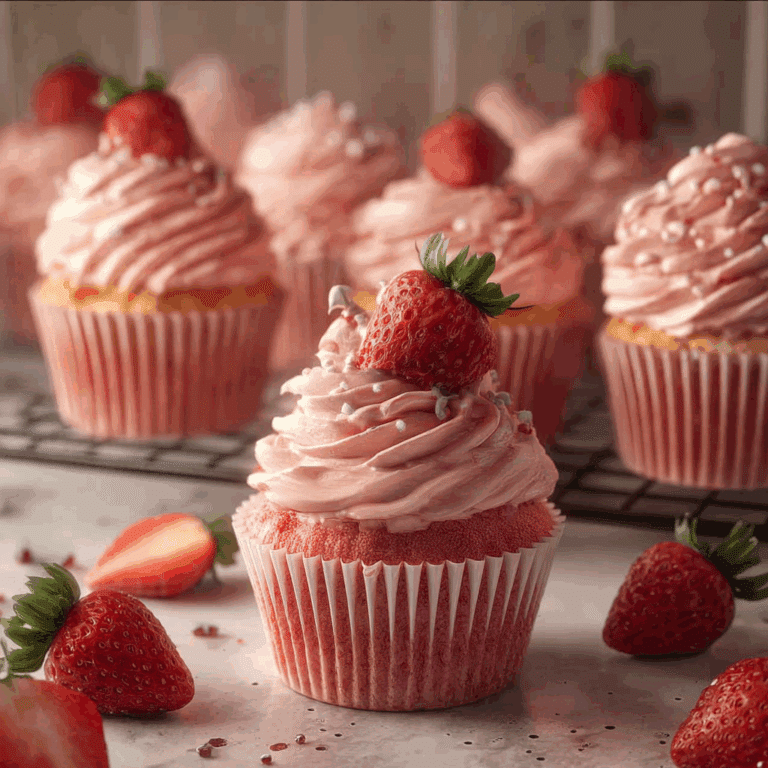
Espresso Brownie Cupcakes

If you’re craving a dessert that perfectly marries the bold richness of espresso with decadently fudgy chocolate, these Espresso Brownie Cupcakes are your dream come true. This irresistible treat blends the intense flavor of espresso with moist, chocolaty brownie cupcakes to create a divine dessert experience you won’t forget. Whether you’re serving them at a special gathering or indulging in a cozy night treat, Espresso Brownie Cupcakes are about to become your new favorite obsession.
Why You’ll Love This Recipe
- Rich and Bold Flavor: The espresso infuses a deep, slightly bitter note that enhances the chocolate’s sweetness perfectly.
- Moist and Fudgy Texture: Unlike typical cupcakes, these have a dense, chewy brownie base that melts in your mouth.
- Perfectly Portion-Controlled: Cupcake size means every bite is just right—enough to satisfy your sweet tooth without going overboard.
- Simple Yet Impressive: Easy to whip up but fancy enough to dazzle guests at parties or family dinners.
- Customizable: From frosting choices to mix-ins, these cupcakes invite fun personal twists for any occasion.
Ingredients You’ll Need
These Espresso Brownie Cupcakes rely on straightforward yet carefully chosen ingredients that bring out the best in flavor and texture. Every component plays a key role, from the espresso’s rich bitterness to the chocolate’s sweetness and butter’s moisture.
- Unsweetened Cocoa Powder: Provides that deep chocolate flavor without overwhelming sweetness.
- Espresso or Strong Coffee: Adds bold, aromatic depth that enhances the chocolate notes.
- All-Purpose Flour: Gives structure to the cupcakes while keeping them tender.
- Granulated Sugar: Balances bitterness and adds sweetness and moisture.
- Unsalted Butter: Melts into the batter for a rich, moist texture.
- Eggs: Bind the ingredients together and contribute to the cupcakes’ fudgy consistency.
- Baking Powder: Provides just enough lift without losing the dense brownie feel.
- Salt: Enhances all flavors and cuts through sweetness.
- Vanilla Extract: Rounds out the flavor with a sweet, fragrant note.
Variations for Espresso Brownie Cupcakes
One of the best things about Espresso Brownie Cupcakes is how easy it is to tailor them to your taste or dietary needs. Feel free to experiment and make this recipe truly your own with the following ideas.
- Nutty Additions: Toss in chopped walnuts or pecans for a crunchy contrast.
- Frosting Flavors: Top with cream cheese frosting, mocha buttercream, or a simple dusting of powdered sugar.
- Dairy-Free Option: Substitute butter with coconut oil and use a dairy-free milk alternative.
- Extra Chocolate Kick: Fold in chocolate chips or chunks for pockets of gooey goodness.
- Spicy Twist: Add a pinch of cinnamon or cayenne pepper for unexpected warmth.

How to Make Espresso Brownie Cupcakes
Step 1: Prepare Your Ingredients
Start by preheating your oven and lining your cupcake tray with paper liners. Gather all ingredients measured and ready, as this recipe moves quickly once mixing begins.
Step 2: Melt Butter and Mix with Cocoa
Gently melt the butter, then whisk in the unsweetened cocoa powder until smooth and glossy; this forms the luscious chocolate base of your batter.
Step 3: Combine Espresso and Sugar
Stir hot espresso or strong coffee into the cocoa mixture along with the granulated sugar, allowing it to dissolve and infuse that irresistible coffee flavor.
Step 4: Add Eggs and Vanilla
Beat in the eggs one at a time, followed by the vanilla extract, creating a silky batter that promises moist cupcakes.
Step 5: Incorporate Dry Ingredients
Sift together flour, baking powder, and salt, then gently fold into the wet ingredients until just combined, keeping the batter dense but smooth.
Step 6: Bake to Perfection
Pour the batter evenly into your cupcake liners, baking at the recommended temperature until a toothpick inserted comes out with moist crumbs but no wet batter.
Step 7: Cool and Decorate
Allow cupcakes to cool completely on a wire rack before frosting or decorating to avoid melting or ruining the cupcake’s texture.
Pro Tips for Making Espresso Brownie Cupcakes
- Use Freshly Brewed Espresso: For the richest coffee flavor, prepare your espresso fresh and hot.
- Don’t Overmix Batter: Mix just until ingredients combine to keep cupcakes fudgy, not cakey.
- Check Doneness Early: Start testing cupcakes a few minutes before the timer to avoid overbaking.
- Cool Completely Before Frosting: Warm cupcakes can cause frosting to melt and slide off.
- Choose High-Quality Cocoa: A good cocoa powder makes a noticeable difference in chocolate intensity.
How to Serve Espresso Brownie Cupcakes
Garnishes
Elevate your Espresso Brownie Cupcakes with toppings like a dusting of cocoa or powdered sugar, a drizzle of melted chocolate, or even a sprinkle of finely chopped espresso beans for crunch.
Side Dishes
Pair your cupcakes with a scoop of vanilla ice cream or a dollop of whipped cream to contrast the rich chocolate and espresso flavors with creamy coolness.
Creative Ways to Present
For parties, serve these cupcakes in cute mini baskets or stacked on a tiered stand with coffee beans scattered around for a café-inspired display that wows.
Make Ahead and Storage
Storing Leftovers
Keep leftover Espresso Brownie Cupcakes in an airtight container at room temperature for up to 2 days or refrigerate to extend freshness to 4 days.
Freezing
Wrap each cupcake individually in plastic wrap and place in a freezer-safe container; they freeze beautifully for up to 3 months without losing texture.
Reheating
Warm frozen or refrigerated cupcakes in the microwave for 10-15 seconds to restore softness and intensify the chocolate-espresso flavor before serving.
FAQs
Can I use instant coffee instead of espresso?
Yes, instant coffee works well if you don’t have espresso available—just dissolve a teaspoon in hot water before mixing to get that rich coffee taste.
Are these cupcakes gluten-free?
This recipe uses all-purpose flour, so it’s not gluten-free as written, but you can swap in a gluten-free flour blend to make them safe for gluten sensitivities.
Can I make this recipe vegan?
With some substitutions like flax eggs, plant-based butter, and dairy-free milk, these cupcakes can be adapted to a vegan diet without sacrificing flavor.
How long do Espresso Brownie Cupcakes last?
Stored properly at room temperature, they stay fresh for a couple of days, or refrigerated for up to four; freezing is best for longer storage.
What’s the best frosting for these cupcakes?
Mocha buttercream, cream cheese frosting, or a simple dusting of powdered sugar all complement the espresso and chocolate perfectly.
Final Thoughts
If you’re ready for a dessert that’s full of bold flavor and mouthwatering texture, don’t wait to try these Espresso Brownie Cupcakes. From the first bite, their rich espresso essence paired with fudgy chocolate will steal the show at any gathering or quiet evening in. So grab your ingredients and treat yourself to something truly special today!
Related Posts
PrintEspresso Brownie Cupcakes

Espresso Brownie Cupcakes combine the bold, rich essence of espresso with moist, fudgy chocolate brownies in perfectly portioned cupcakes. This decadent dessert offers a luscious balance of deep coffee flavor and chocolate sweetness, ideal for parties, cozy nights, or any special occasion.
- Prep Time: 15 minutes
- Cook Time: 20 minutes
- Total Time: 35 minutes
- Yield: 12 cupcakes 1x
- Category: Dessert
- Method: Baking
- Cuisine: American
- Diet: Not gluten-free as written (can be made gluten-free with substitutions)
Ingredients
Dry Ingredients
- 3/4 cup unsweetened cocoa powder
- 1 cup all-purpose flour
- 1 tsp baking powder
- 1/4 tsp salt
Wet Ingredients
- 1/2 cup (1 stick) unsalted butter
- 1/2 cup hot espresso or strong coffee
- 1 1/4 cups granulated sugar
- 2 large eggs
- 1 tsp vanilla extract
Instructions
- Prepare Your Ingredients: Preheat your oven to 350°F (175°C) and line a cupcake tray with paper liners. Measure and gather all ingredients to ensure smooth preparation.
- Melt Butter and Mix with Cocoa: Gently melt the unsalted butter, then whisk in the unsweetened cocoa powder until the mixture is smooth and glossy, forming the chocolate base of the batter.
- Combine Espresso and Sugar: Stir the hot espresso or strong coffee into the cocoa mixture along with the granulated sugar, allowing the sugar to dissolve completely and infuse the coffee flavor.
- Add Eggs and Vanilla: Beat in the eggs one at a time, ensuring each is well incorporated, then mix in the vanilla extract to create a silky, smooth batter.
- Incorporate Dry Ingredients: Sift together the all-purpose flour, baking powder, and salt. Gently fold these dry ingredients into the wet mixture until just combined, keeping the batter dense and fudgy.
- Bake to Perfection: Evenly pour the batter into the prepared cupcake liners. Bake at 350°F (175°C) for about 18-22 minutes, or until a toothpick inserted comes out with moist crumbs but no wet batter.
- Cool and Decorate: Remove cupcakes from the oven and transfer to a wire rack to cool completely before frosting or decorating to maintain texture and prevent frosting from melting.
Notes
- Use freshly brewed espresso for the richest coffee flavor.
- Mix batter only until ingredients combine to avoid cakey cupcakes.
- Check doneness a few minutes early to prevent overbaking.
- Allow cupcakes to cool completely before frosting.
- Choose high-quality cocoa powder for intense chocolate taste.
Nutrition
- Serving Size: 1 cupcake
- Calories: 220
- Sugar: 20g
- Sodium: 85mg
- Fat: 12g
- Saturated Fat: 7g
- Unsaturated Fat: 4g
- Trans Fat: 0g
- Carbohydrates: 28g
- Fiber: 3g
- Protein: 3g
- Cholesterol: 50mg
Keywords: espresso, brownie cupcakes, chocolate, coffee dessert, fudgy cupcakes, espresso brownies, chocolate cupcakes