5 Irresistible Chocolate-Dipped Sugar Wafers Recipes
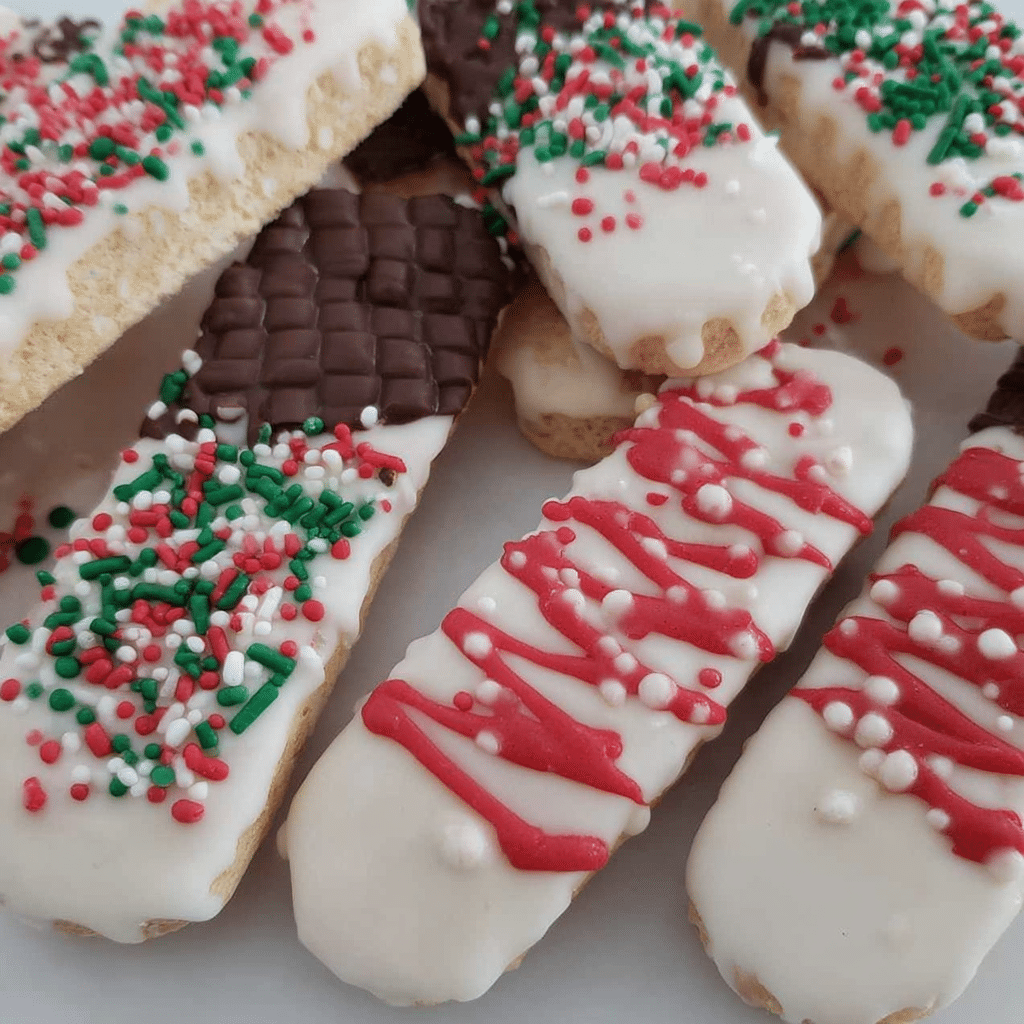
If you have a craving that calls for something crunchy, sweet, and decadently coated in chocolate, then you absolutely must try these Chocolate-Dipped Sugar Wafers. These treats combine the delicate crispness of classic sugar wafers with the rich, velvety embrace of melted chocolate, making for an irresistible snack or dessert. Whether you’re hosting a party, looking for a quick afternoon pick-me-up, or searching for an easy homemade gift option, these Chocolate-Dipped Sugar Wafers recipes are your ticket to sweet tooth satisfaction with minimal fuss.
Why You’ll Love This Recipe
- Quick to Prepare: These recipes come together in under 30 minutes, perfect for last-minute cravings or sweet surprises.
- Versatile Flavors: From classic milk chocolate to exciting twists like white chocolate and nuts, there’s something for every palate.
- Minimal Ingredients: You only need a handful of simple, pantry-friendly items to make these delectable treats.
- Great for Gifting: The elegant presentation makes these wafers an ideal homemade gift for friends and family.
- Perfect Crunch: The wafers maintain their crispy texture, balancing perfectly with the smooth chocolate coating.
Ingredients You’ll Need
This recipe focuses on using straightforward ingredients that bring out the best in every bite. Each component plays a key role in delivering the delicious taste, texture, and appeal of your Chocolate-Dipped Sugar Wafers.
- Sugar Wafers: The star ingredient providing that light, crisp foundation essential for the perfect bite.
- Chocolate Chips or Bars: Choose high-quality dark, milk, or white chocolate for smooth melting and rich flavor.
- Butter or Coconut Oil: Adding a bit of fat helps the chocolate coating become silky and glossy.
- Toppings (Optional): Nuts, sprinkles, shredded coconut, or sea salt to add texture and personalized flair.
- Vanilla Extract: A splash enhances the chocolate’s depth and aroma, bringing warmth to the treat.
Variations for Chocolate-Dipped Sugar Wafers
These Chocolate-Dipped Sugar Wafers recipes are easily adaptable, so don’t hesitate to get creative! Whether you have dietary preferences, available ingredients, or just want a fresh twist, these variations can help you tailor the experience to your liking.
- Nutty Delight: Sprinkle crushed almonds, pistachios, or hazelnuts on the chocolate before it sets for added crunch and flavor.
- Spicy Kick: Add a pinch of chili powder or cinnamon to the melted chocolate for a subtle warmth that pairs beautifully with the sweetness.
- Vegan Version: Use dairy-free chocolate and coconut oil in place of butter to keep it plant-based and just as tasty.
- Flavor Drizzle: After dipping, drizzle contrasting chocolate (white over dark or vice versa) for a stunning two-tone effect.
- Sea Salt Finish: A light sprinkle of flaky sea salt enhances the chocolate’s richness and balances the sweetness perfectly.

How to Make Chocolate-Dipped Sugar Wafers
Step 1: Prepare Your Workspace
Line a baking sheet with parchment paper or a silicone mat to create a non-stick surface for drying your dipped wafers. This prevents any mess and ensures easy cleanup.
Step 2: Melt the Chocolate
Chop your chosen chocolate into small, uniform pieces to aid in even melting. Use a double boiler or microwave in short bursts (15-20 seconds), stirring regularly until smooth and glossy. Stir in butter or coconut oil and vanilla extract for enhanced texture and flavor.
Step 3: Dip the Sugar Wafers
One at a time, gently hold a sugar wafer by the edges and dip it halfway into the melted chocolate. Let the excess drip back into the bowl before placing the wafer on your prepared sheet.
Step 4: Add Toppings (Optional)
Quickly sprinkle desired toppings such as nuts, sea salt, or sprinkles onto the chocolate before it hardens to personalize your wafers.
Step 5: Chill and Set
Place the baking sheet in the refrigerator for at least 15-20 minutes to allow the chocolate to fully harden. Avoid stacking until completely set to maintain the wafers’ crisp texture.
Pro Tips for Making Chocolate-Dipped Sugar Wafers
- Use Room Temperature Wafers: Avoid chilling wafers beforehand to prevent moisture buildup that can affect crispness.
- Temper the Chocolate: If you want a glossy, non-sticky finish, temper your chocolate by carefully controlling the melting and cooling process.
- Work Quickly: Chocolate sets fast, so be prompt with your dipping and topping to ensure an even coat.
- Choose Quality Chocolate: Higher-quality chocolate melts better and tastes richer, enhancing your overall experience.
- Storage Matters: Keep your wafers in an airtight container at cool room temperature or refrigerated to maintain freshness.
How to Serve Chocolate-Dipped Sugar Wafers
Garnishes
Consider dusting your Chocolate-Dipped Sugar Wafers with powdered sugar or edible glitter for extra visual appeal, perfect for parties and special occasions.
Side Dishes
Pair these crispy treats with a cup of freshly brewed coffee, hot tea, or even a chilled glass of milk to perfectly balance the sweetness and add a comforting touch.
Creative Ways to Present
Stack your wafers in a decorative jar with layers of colored tissue paper, or arrange them elegantly on a platter alongside fresh berries and whipped cream for a stunning dessert display.
Make Ahead and Storage
Storing Leftovers
Store your Chocolate-Dipped Sugar Wafers in an airtight container at room temperature, away from direct heat and sunlight, to keep them crisp for up to one week.
Freezing
You can freeze the wafers in a single layer on a baking sheet first; once hardened, transfer them to a freezer-safe bag. They keep well for up to 1 month and thaw quickly before serving.
Reheating
Chocolate-dipped wafers are best enjoyed cold or at room temperature, so avoid reheating to preserve their texture. If needed, simply let them come to room temperature from the fridge for a few minutes before eating.
FAQs
Can I use any type of wafer for this recipe?
While sugar wafers are ideal due to their sweetness and crispness, you can experiment with other flavors or textures of wafers if you like, just keep in mind it may change the end taste and crunch.
What kind of chocolate works best for dipping?
High-quality baking chocolate or couverture chocolate is best because they melt smoothly and provide a rich flavor, but regular chocolate chips can also work well in a pinch.
How do I prevent the chocolate from melting back on the wafers?
Working over parchment paper and allowing the chocolate to set in the refrigerator will help it harden quickly and avoid melting or sticking issues.
Can I add fillings between two wafers before dipping?
Absolutely! Try sandwiching your wafers with peanut butter, jam, or cream cheese before dipping for an extra layer of flavor and texture.
Are these recipes suitable for kids to make?
Yes! These Chocolate-Dipped Sugar Wafers recipes are kid-friendly with simple steps and minimal heat exposure, especially if an adult handles the melting process.
Final Thoughts
There’s something truly magical about the crunch of delicate sugar wafers paired with smooth, luscious chocolate that makes these treats impossible to resist. Whether you stick to the classic recipe or explore the delightful variations, these Chocolate-Dipped Sugar Wafers are sure to become a beloved favorite. So grab your ingredients, get dipping, and enjoy every sweet, crunchy bite with joy!